Color Management in Your Tools

In the book, a lot of time was spent talking about Photoshop. There’s a reason for that: Adobe has been concerned with color management from the very beginning. Remember when I talked above about scanning film and printing the results on paper with ink? Photoshop and other desktop publishing apps needed to manage color as soon as that first pixel came off the scanner on its way to the printer.

But we all have a lot of tools that we use to assemble websites and native apps. How do they manage color?

We can’t cover all tools that are in the market, so we’ll focus on a few of the most popular apps and how they perform common tasks.

It's also likely that our tools will evolve over the coming years as color management becomes more important while building apps. This page can be updated much more easily than a book!

Drawing with Vectors

Much of our work begins with vectors. Whether it’s a simple wireframe or a complex illustration, many visual elements start as shapes in an editor. As you’re creating these objects, it’s a good idea to think about color management early in the process.

Illustrator

Adobe uses the same color management engine throughout all its products, and Illustrator provides nearly identical color settings as Photoshop:
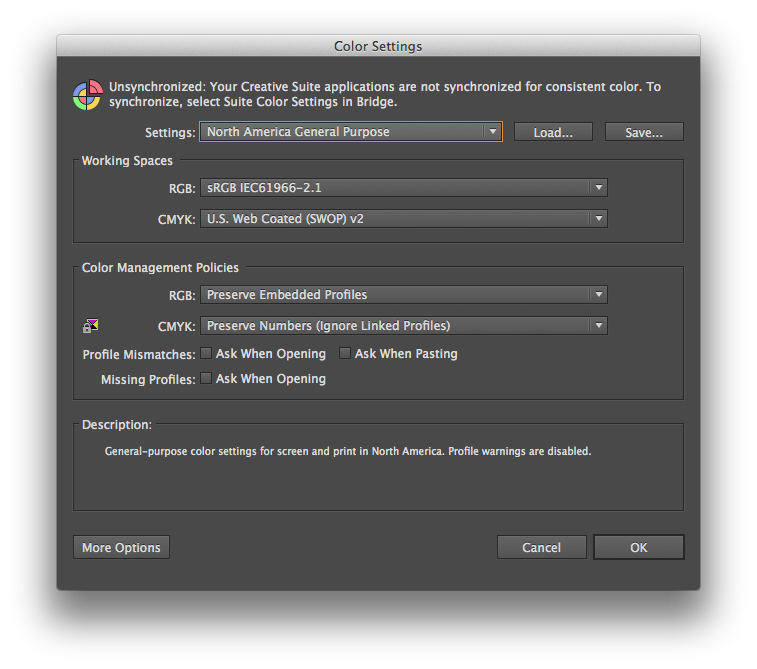
Color management settings in Adobe Illustrator

What’s more, Adobe lets you synchronize your settings across the entire Creative Suite. Using the Bridge app, it's easy to make sure that your vectors and bitmaps handle color consistently.

Sketch

Sketch is another popular app for drawing vectors and saving bitmaps. Early versions of the app did not have managed color, but that all changed beginning with Version 48. If you're on an older version, I highly recommend renewing your license to get the features described below.

By default, both new documents and ones from an older version have no color profile assigned. Sketch refers to these documents as “Unmanaged” and they’re easy to move into a color managed workflow with the File > Change Color Profile… menu.

The dialog that appears gives you a choice of three color profiles: “Unmanaged”, “sRGB”, and “Display P3”. The best part is that each selection provides a clear and concise description along with a brief recommendation for its use.

After selecting the profile, there is a confirmation banner at the bottom of the window. Clicking on the question mark leads you to a full description of how Sketch manages color.
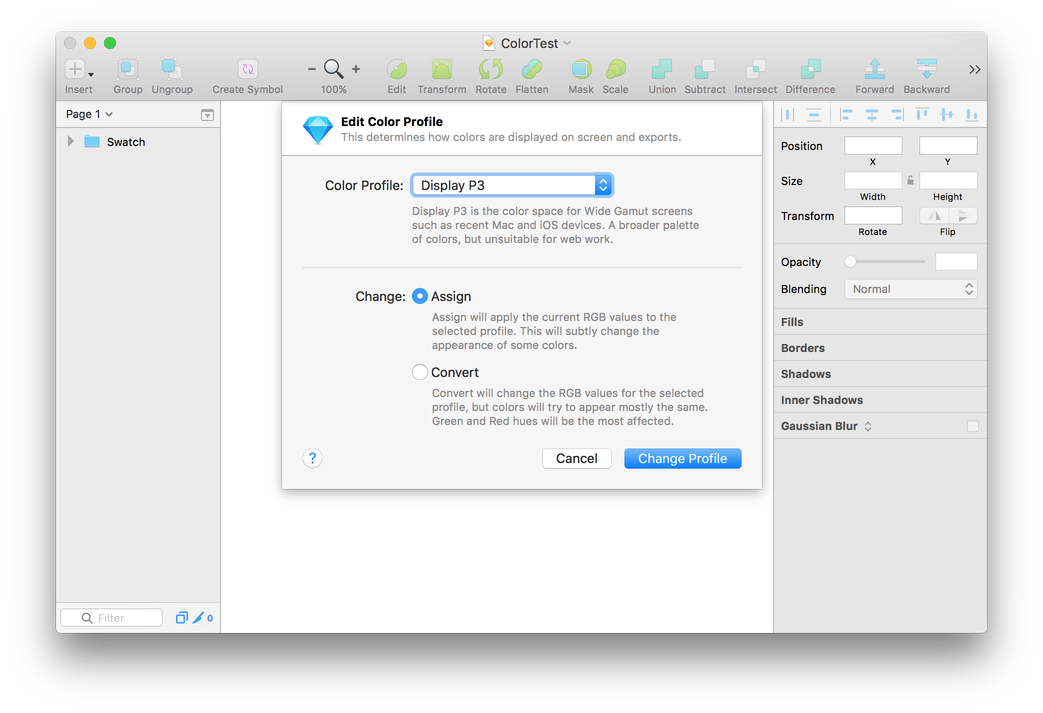
Color management settings in Sketch

If the needs of your project change, such as if you decide to move from sRGB to Display P3 assets, there will be additional choices to “Assign” or “Convert” the RGB color values. Again, the in-app help here is excellent.

When exporting, Sketch attaches the document profile to the output image by default. The app also has a Save for Web option that removes EXIF metadata and the color profile information:
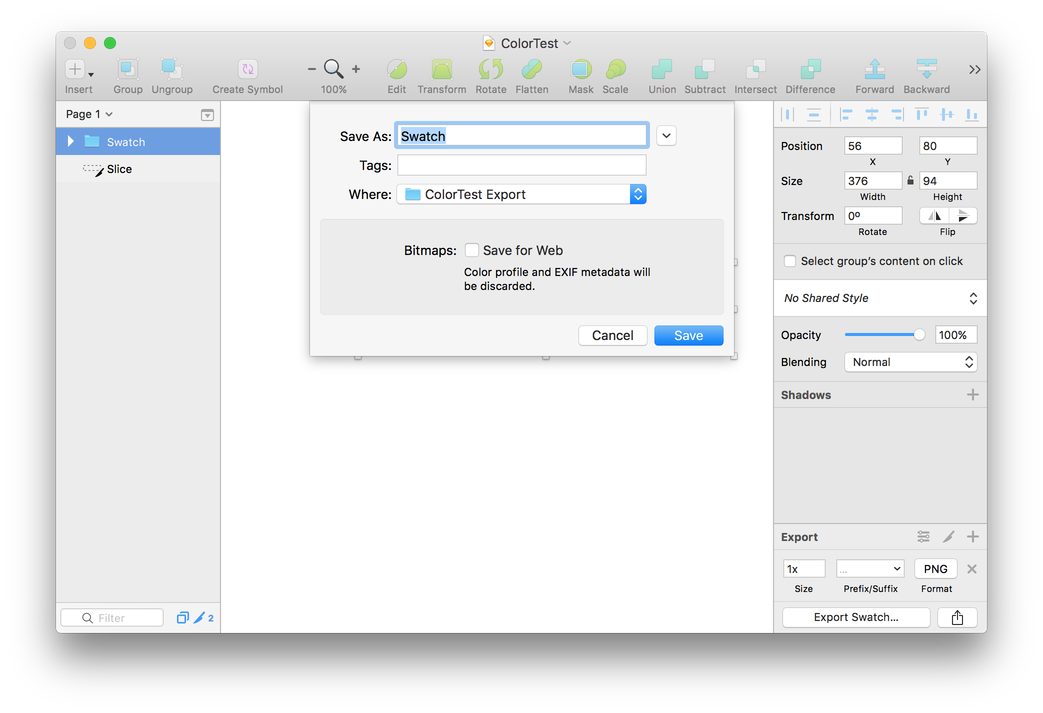
Color management settings in Sketch

Exporting slices also maintains the base document profile in the output file. If you’re exporting SVG graphics, no color profile information is embedded since support for that feature isn’t supported well in browsers.
Editing Bitmap Images

Photoshop isn’t the only image editor in town. Many folks prefer to use other tools instead of, or in addition to, this well known manipulator of pixels. Let’s take a quick look at how a couple of popular alternatives work.

Pixelmator

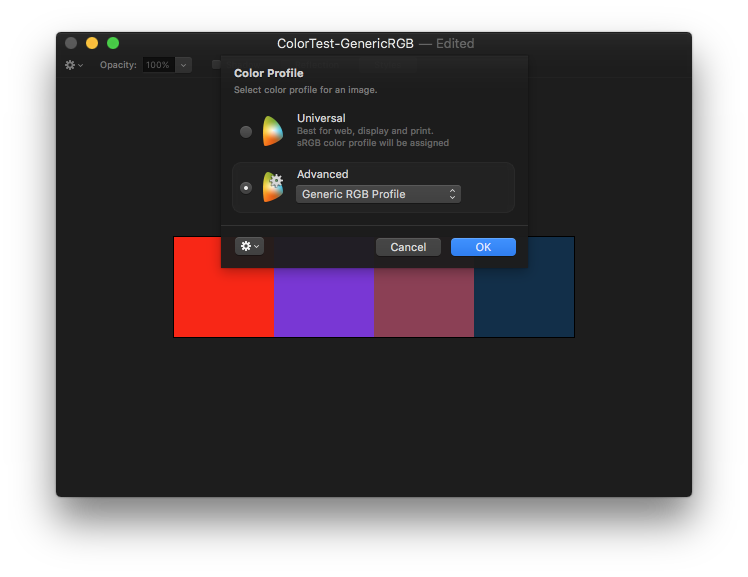
When you open an image with Pixelmator, it uses any color profile that’s embedded. The app also takes a very pragmatic approach for new documents or ones without a profile: it uses sRGB by default in setting called “Universal”.

You can also modify the color profile of a Pixelmator document using the Image > Color Profile… menu item. It even uses the same keyboard shortcut as Photoshop: ⇧⌘K.

By default, the app will do a “Match to Profile” which behaves exactly like Photoshop’s convert functions: pixels are modified when a new profile is selected. You can use the sheet’s gear icon to choose the “Assign Profile” mode where no raw color values are changed:

Color management settings in Pixelmator

When you Export a document, the current color profile is embedded in the output image. The Web Export feature can be used to save a file without an embedded profile. If you’re exporting slices, no color profiles are saved.

Acorn

Acorn’s defaults are also familiar—the tool respects embedded profiles, and uses sRGB for images without profiles and new documents.

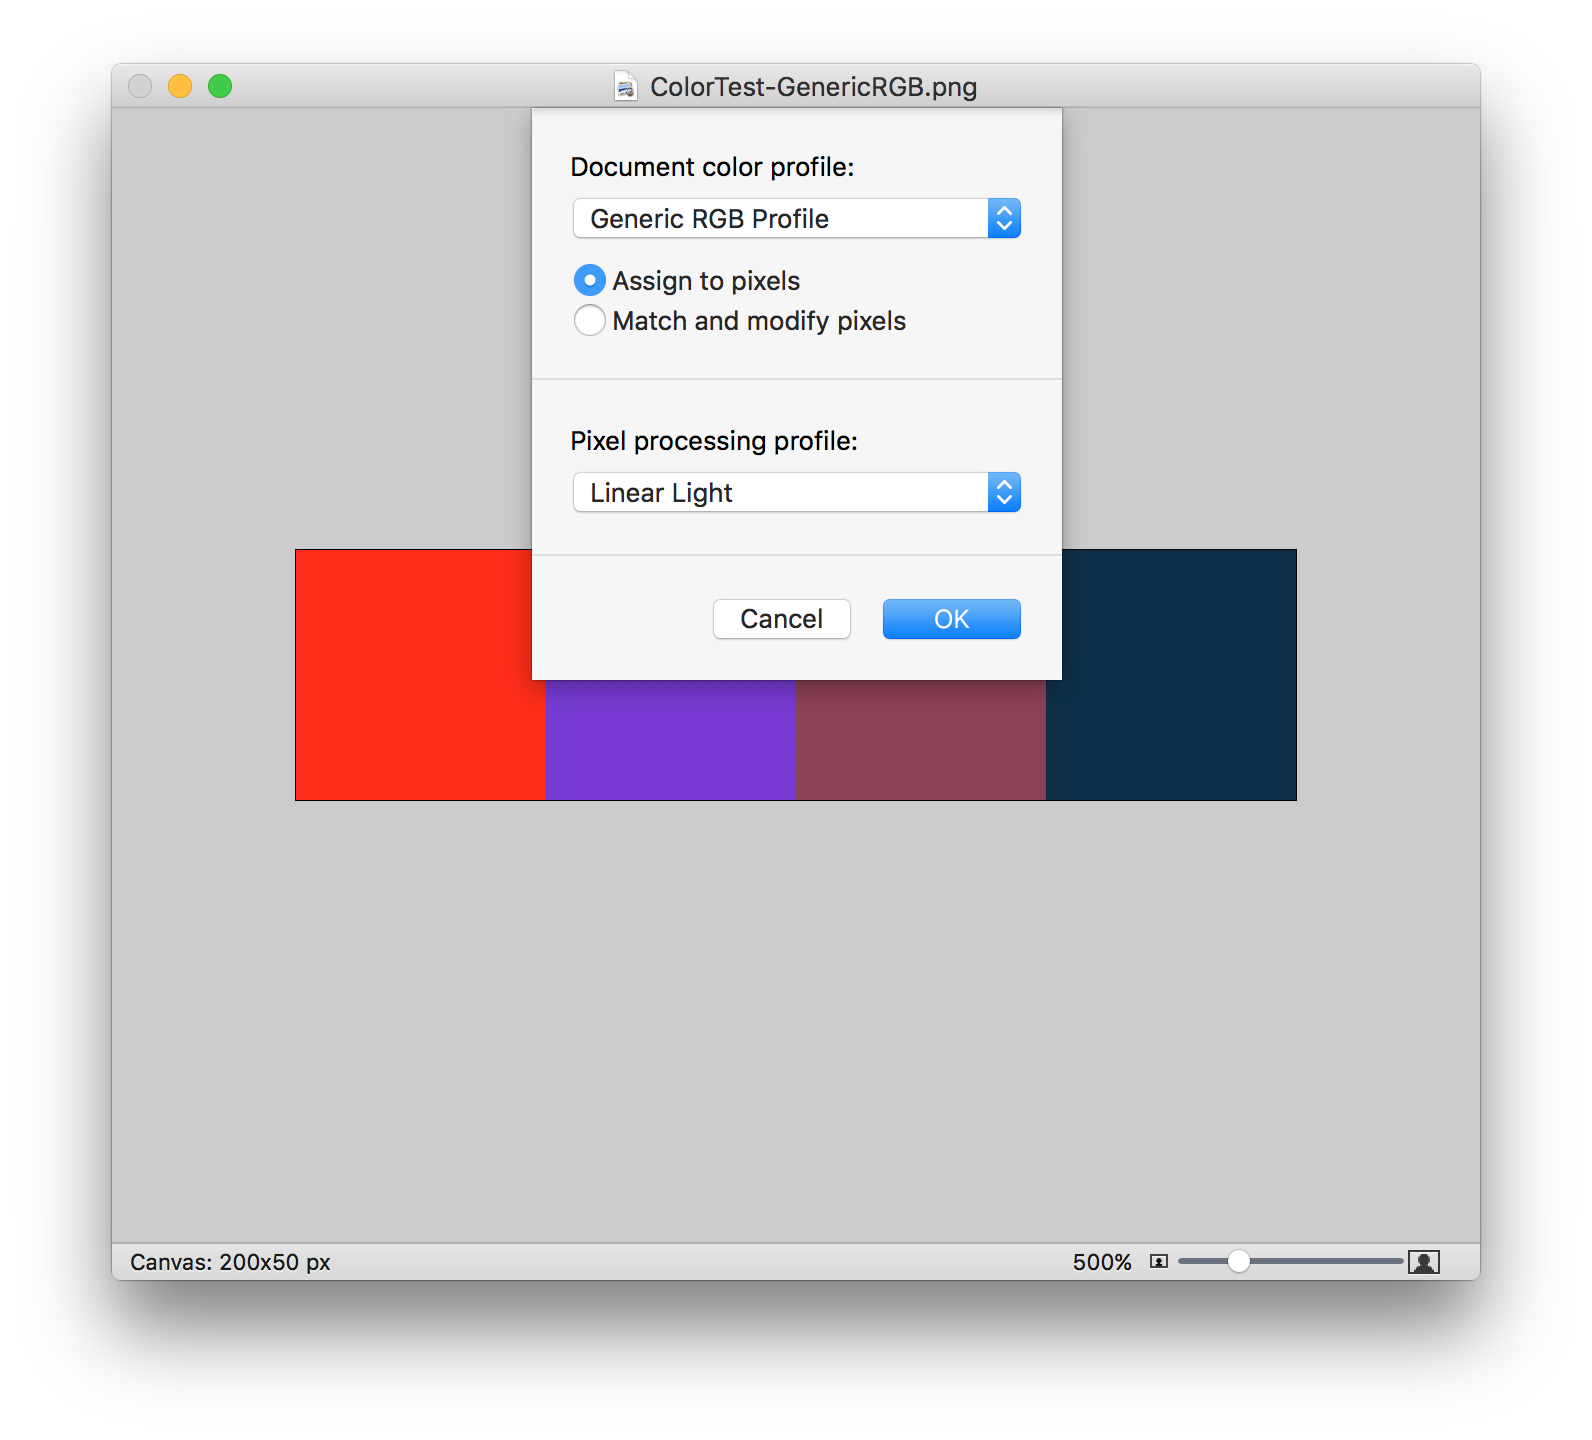
The app lets you choose a “Document color space” with the Image > Color Profile… menu. After choosing a color profile from the popup menu, you have an option to "Assign to pixels" or "Match and modify pixels". The default is to assign where no raw pixel values get modified. If you need to convert the pixels from one color space to another, use the match option. The “Pixel processing profile” setting in the sheet can be ignored since it’s only used to optimize image processing.

Color management settings in Acorn

When you export a document with Acorn, the current color profile is embedded in the output image. The Web Export feature has a checkbox that lets you control whether a profile is embedded in the output image.

Marking Up Web Pages

Color is important on the web, as you first saw with Dr. Eyeful’s site. Many of the tools we use to craft our pages have color management built into their editing and previewing functions.

Typically, these tools use the same underlying technologies as our browsers, so we’ll only summarize the behavior here. The book's chapter on how web pages are color managed is much more comprehensive. For now, just take note of which rendering engine is being used by your favorite tool.

It’s also worth noting that most tools on the Mac will use WebKit to render content (Apple supplies tools for developers that make it easy to include these capabilities.) When in doubt, it’s usually safe to assume that your tool will display HTML and CSS like Safari.

Macaw

Macaw is a visual web design tool for creating semantic HTML and CSS. Since you’ll be using it to write and preview content that will be color managed, it’s important to know how it handles profiles.

When editing or publishing, colors specified in CSS are rendered as raw values using the display’s color profile. Images are rendered using any embedded profile, otherwise the display’s profile is used.

This is exactly how Google Chrome handles color. It’s no surprise then that the Blink rendering engine is being used behind the scenes in this app.

Coda

Coda is an integrated development environment (IDE) for creating web sites. While many of its features revolve around a powerful text editor for HTML and CSS, it also has excellent previewing capabilities for the pages you’re creating.

These previews are generated with WebKit; the rendering engine that’s used in Safari. CSS is rendered in the sRGB color space. Images without an embedded color information are displayed using the sRGB profile, otherwise the attached profile is used.