Notepad Replacement
Notepad is a default text editor shipped with Windows. You may want to use Notepad++ instead of Notepad. However, there’s no obvious way to do it.
From the version 7.5.9 onward, you can run the following command to make Notepad++ replace Notepad (run in cmd.exe with Administrator privileges)†:
reg add "HKLM\Software\Microsoft\Windows NT\CurrentVersion\Image File Execution Options\notepad.exe" /v "Debugger" /t REG_SZ /d "\"%ProgramFiles(x86)%\Notepad++\notepad++.exe\" -notepadStyleCmdline -z" /f
Note that you may need to use %ProgramFiles%\Notepad++\ to substitute for %ProgramFiles(x86)%\Notepad++\ if you have Notepad++ 64-bit installed, or use other path if your Notepad++ is installed in a non-default location.
Use the the following comment to undo the replacement:
reg delete "HKLM\Software\Microsoft\Windows NT\CurrentVersion\Image File Execution Options\notepad.exe" /v "Debugger" /f
This has historically worked from Windows 7 through Windows 10. However, Microsoft has changed things in Windows 11 , and this may not work for you.
Registry Edit Warning
† Warning: editing your registry can be dangerous; edit your registry at your own risk; the developers of Notepad++ and contributors to this documentation cannot and will not be held responsible for mistakes made during registry changes or unintendended consequences of such edits
Explorer Right-Click menu
When you install Notepad++ normally, Notepad++ will add an Edit with Notepad++ Explorer Right Click action for all file types. (This is separate from any file types that you use the Settings > Preferences > File Association or other Windows-standard means to “associate” that file type with Notepad++.)
Missing “Edit with Notepad++” Action
If you are missing this feature, you can add it to your registry using your favorite method. One such method is to save the following as a .reg file and run it†:
Single User
Windows Registry Editor Version 5.00

[HKEY_CURRENT_USER\SOFTWARE\Classes\*\shell\Notepad++]
@="Edit With Notepad++"

[HKEY_CURRENT_USER\SOFTWARE\Classes\*\shell\Notepad++\command]
@="\"C:\\Program Files\\Notepad++\\notepad++.exe\" \"%1\""
(If your installation is not in c:\Program Files\Notepad++, you will have to adjust that script.)
All Users (requires admin privileges)
Windows Registry Editor Version 5.00

[HKEY_CLASSES_ROOT\*\shell\Notepad++]
@="Edit With Notepad++"

[HKEY_CLASSES_ROOT\*\shell\Notepad++\command]
@="\"C:\\Program Files\\Notepad++\\notepad++.exe\" \"%1\""
(If your installation is not in c:\Program Files\Notepad++, you will have to adjust that script.)
Windows 11 Right-Click Workarounds
Windows 11 hides the old right click menu, so even with a normal installation or if you’ve manually added those associations, the Edit with Notepad++ might not be visible for you in Windows 11. The right click menu contains a Show More Options action which will bring up the old-style right click context menu with the old actions; this can also be accessed using the default Shift+F10 shortcut on a file instead of right-clicking.
If that is not sufficient for you, https://www.tomshardware.com/how-to/windows-11-classic-context-menus describes a possible method of changing your registry† to get the old right click context menu by default again in Windows 11.
If you would rather have it in your modern Windows 11 right click, the following .reg files might bring Edit with Notepad++ to your Windows 11 right click†:
Single User
Windows Registry Editor Version 5.00

[HKEY_CURRENT_USER\SOFTWARE\Classes\*\shell\pintohome]
"MUIVerb"="Edit with Notepad++"

[HKEY_CURRENT_USER\SOFTWARE\Classes\*\shell\pintohome\command]
@="\"C:\\Program Files\\Notepad++\\notepad++.exe\" \"%1\""
(If your installation is not in c:\Program Files\Notepad++, you will have to adjust that script.)
All Users (requires admin privileges)
Windows Registry Editor Version 5.00

[HKEY_CLASSES_ROOT\*\shell\pintohome]
"MUIVerb"="Edit with Notepad++"

[HKEY_CLASSES_ROOT\*\shell\pintohome\command]
@="\"C:\\Program Files\\Notepad++\\notepad++.exe\" \"%1\""
(If your installation is not in c:\Program Files\Notepad++, you will have to adjust that script.)
Notepad++ Cheat sheet
Tabs
The tab bar settings can be found at Settings > Preferences > General > Tab Bar, including the option to Hide the tab bar.
To switch between first and last tab, use Ctrl + Shift +
MOUSEWHEELon tabs.MOUSEWHEELup will take to first tab while down will take to last tab.
To switch and activate next/previous tab, there are multiple options:
- Use Ctrl +
MOUSEWHEELon tabs.MOUSEWHEELup will take to previous tab while down will take next tab. - Use Ctrl + Page Up for next tab and Ctrl + Page Down for previous tab.
- Use Ctrl + Tab for next tab and Ctrl + Shift + Tab for previous tab. Using use Ctrl + Tab or Ctrl + Shift + Tab while MRU is enabled provides great user experience. To enable MRU you can follow
Settings->Preferences->MISC.->Document Switcher, then tick bothEnableandEnable MRU Behavior.
- Use Ctrl +
To move tab from one position to other position:
- Use Shift +
MOUSEWHEELon tabs.MOUSEWHEELup will move currently selected tab to previous position while down will move to next position. - Use Ctrl + Shift + Page Up for previous position and Ctrl + Shift + Page Down for next position.

- Use Shift +
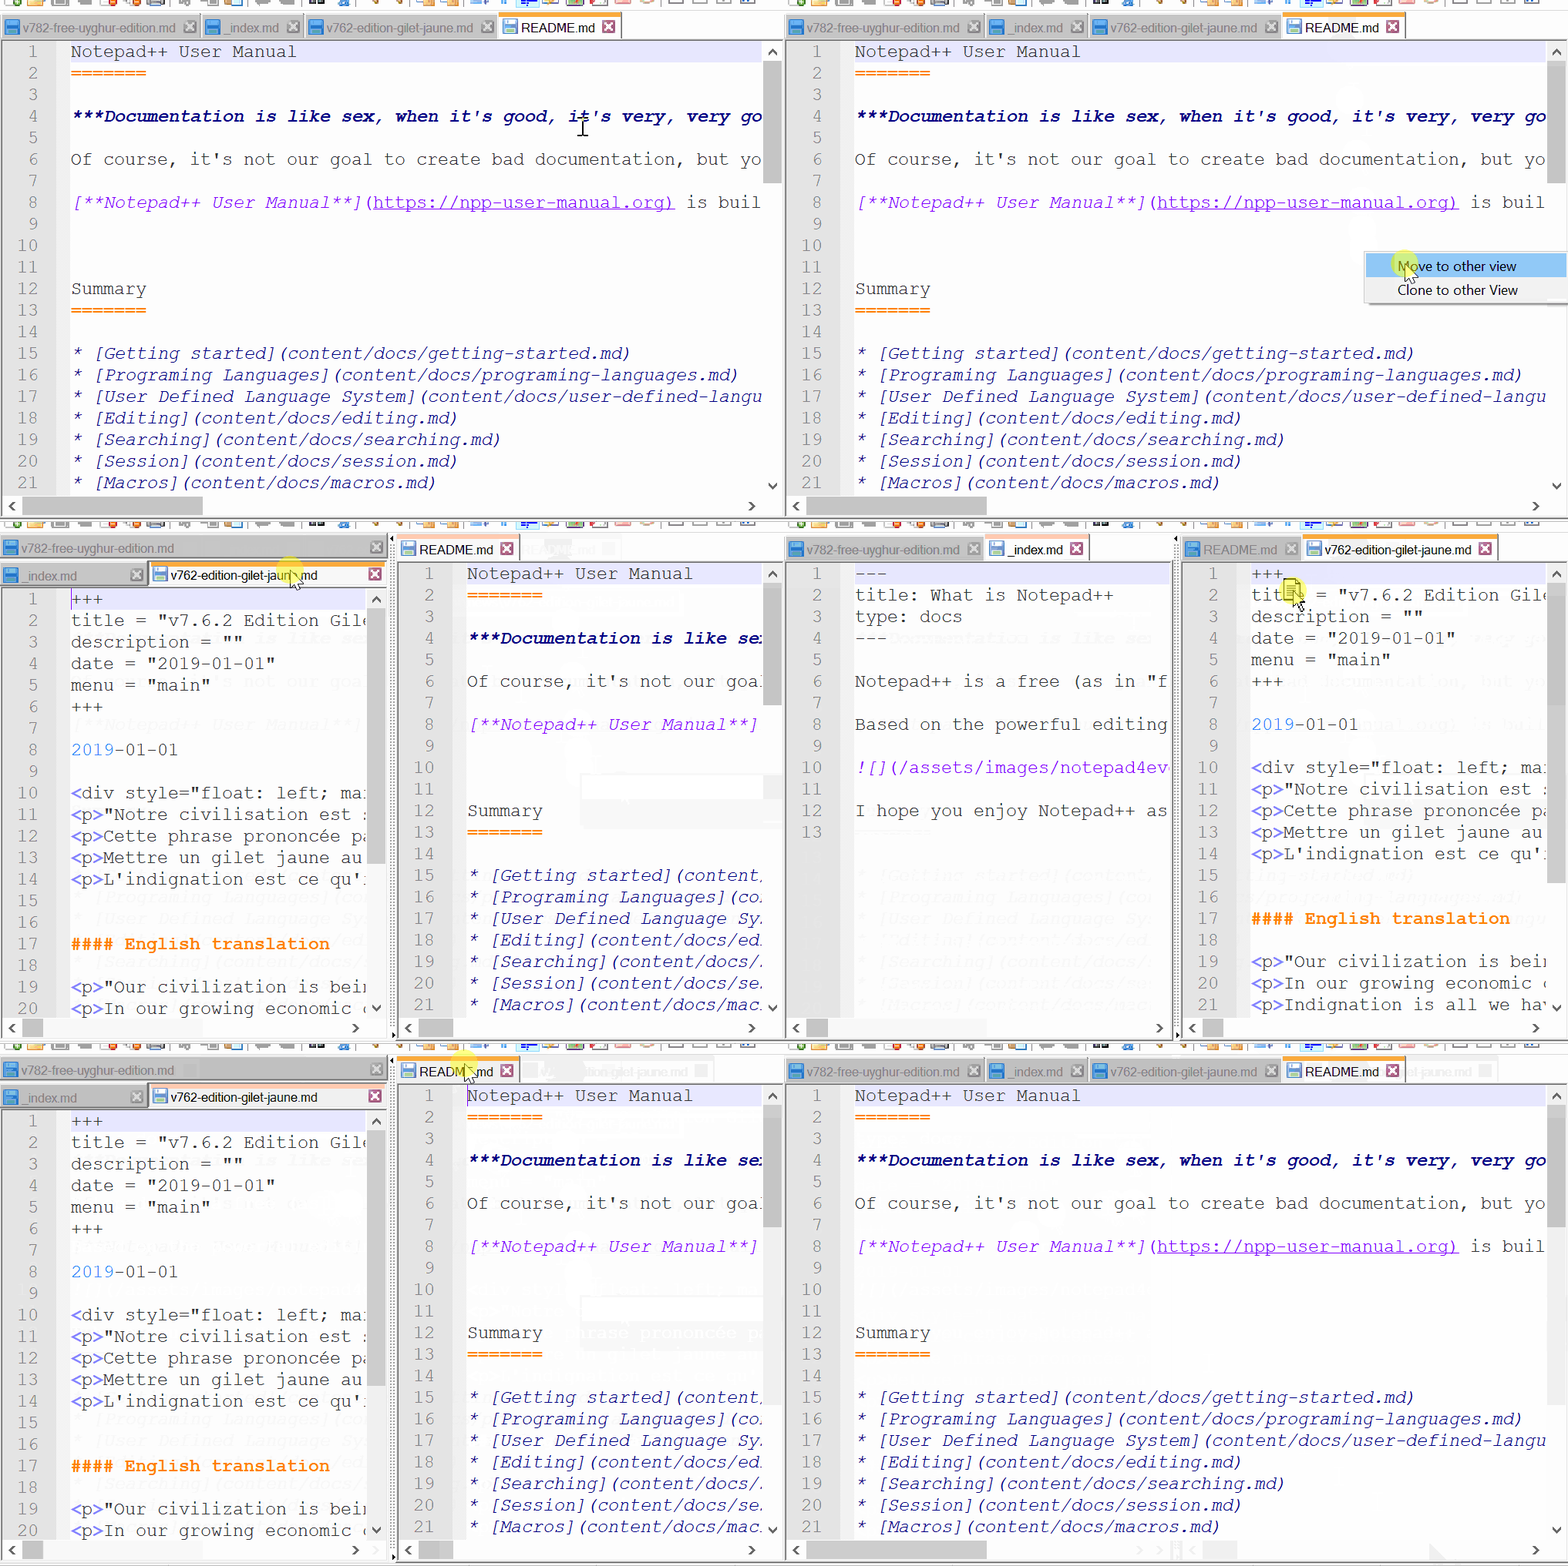
To move a tab from one View to the other, you can use the techniques described in the Editing > Dual View section, including:
- Use the menus: View > Move/Clone Current Document > Move to Other View
- Right Click on the tab’s title and select Move to Other View
- Drag the tab’s title into the editing pane for that same tab and select Move to Other View
- If the other View is already visible, drag the tab’s title into the editing pane of the other View, and it will move

To clone a tab from one View into the other, you can use the techniques described in the Editing > Clone Document section, including:
- Use the menus: View > Move/Clone Current Document > Clone to Other View
- Right Click on the tab’s title and select Clone to Other View
- Drag the tab’s title into the editing pane for that same tab and select Clone to Other View

To create a new file tab using the tab bar:
- If there is empty area to the right of the last tab in the tab bar, double click there and a new tab will be created

- If there is empty area to the right of the last tab in the tab bar, double click there and a new tab will be created
To close a tab using the tab bar:
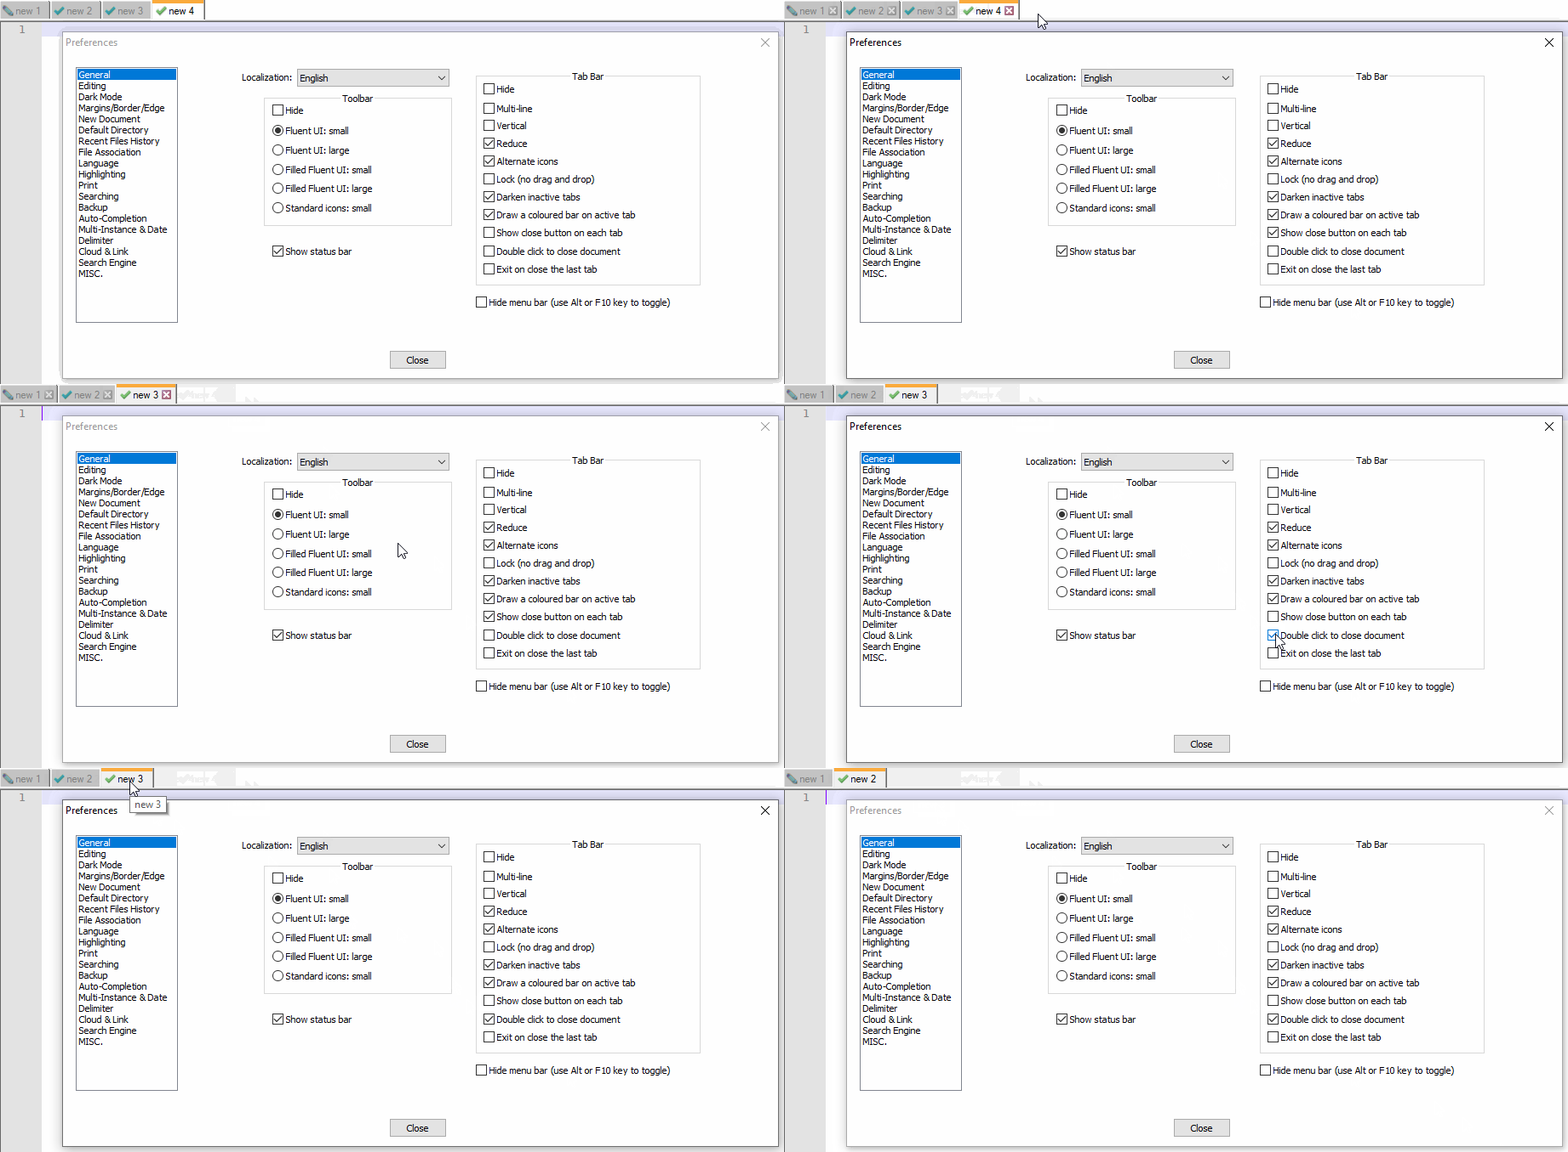
- If Settings > Preferences > General > Tab Bar > Show close button on each tab is checked, you can click the red ☒ on that tab to close that tab
- If Settings > Preferences > General > Tab Bar > Double click to close document is checked, you can double-click the tab’s title to close that tab

Tab Bar Right Click Menu
When you right click on the title for a tab, you get a context menu for manipulating that tab.
Close: closes this file’s tabClose Mutiple Tabs >:Close All But This: Closes all files except this fileClose All to the Left: Closes all files that are to the right of this file on the tab barClose All to the Right: Closes all files that are to the left of this file on the tab barClose All Unchanged: Closes all files that do not have unsaved changes (leaves only files that have unsaved changes)
Save: Saves the file (disabled/greyed out if there are no unsaved changes)Save As: Allows you to save the current file under a new nameOpen Into >:Open Containing Folder in Explorer: Opens this file’s folder in the Windows ExplorerOpen Containing Folder in cmd: Opens this file’s folder in thecmdcommand promptOpen Containing Folder as Workspace: Opens this file’s folder as a Folder as Workspace
Rename: Renames this fileMove to Recyle Bin: Deletes the current file (placing it safely in Window’s Recycle Bin)Reload: Reloads this file from diskPrint: Prints this fileRead-Only: Sets this file’s Notepad++-specific read-only flag (see more in the Edit menu description)Clear Read-Only Flag: Clears this file’s read-only flag for the Windows OS (see more in the Edit menu description)Copy to Clipboard >Copy Full File Path: Copies the full file path (drive, directory, and filename) to the Windows ClipboardCopy Filename: Copies just the filename (no drive or directory) to the Windows ClipboardCopy Current Dir. Path: Copies the file’s directory (drive and directory, but not the filename) to the Windows Clipboard
Move Document >Move to Other View: Moves the tab from one view to the otherClone to Other View: Makes a tab for the same file in the other viewMove to New Instance: Moves the tab from this Notepad++ instance to a newly-created instance (only works on named files that have no unsaved changes)Open in New Instance: Makes a tab in a new Notepad++ instance which contains the same file as this tab (only works on named files that have no unsaved changes)
Apply Color to Tab >(new to v8.4.6)Apply Color #: Applies the indicated color to the highlight portion of the tab bar. (Applying a different color will change the color, not combine the colors together. Each tab can only have one color.)Remove Color: Removes the color of the tab, returning to the default color scheme
Menu Bar
The menu bar of Notepad++ has a variety of menus, including File (for generic file operations like open and close), Edit, Search, and View, Encoding (which affects how the bytes of the file are interpreted as text – whether ANSI or UTF-8 or similar), Language (for syntax highlighting), Settings, Tools (with a couple of built-in utilities), Macro, Run (for running external commands), Plugins, and the Window menu (for accessing open files already open in Notepad++).
It also contains the ? menu, which is a Help-style menu, including actions that list the command line arguments; actions that take you to the Notepad++ home page, the project page, this user manual, and the Community Forum; actions for the updater and proxy; the Debug Info (which is critical information when asking for help at the Community Forum or when creating a feature request or bug report at the project page) and About.
At the far right of the menu bar there are also icons + (to create a New file), ▼ (to choose from the open files), and X (which closes the active tab). (Before v8.4.3, only the X existed in that area of the menu bar. Starting in v8.4.5, these can be made hidden using Settings > Preferences > General > Menu.)
Toolbar
There is a toolbar which has icons for various common tasks. The toolbar settings can be found at Settings > Preferences > General > Toolbar, including the option to Hide the toolbar. If you do not understand the icon, hovering over that icon will show the underlying action.